
Are you a garlic lover looking for a way to preserve the pungent cloves?
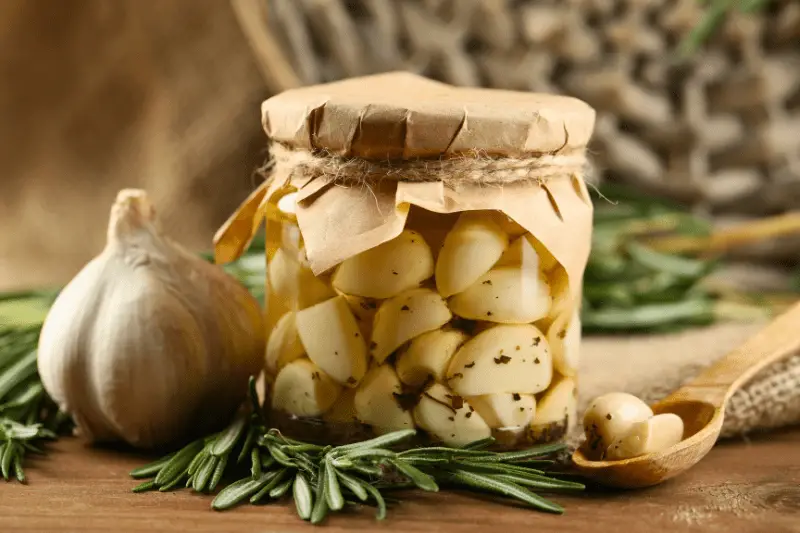
Look no further than pickling! Pickled garlic is a flavorful and versatile addition to any dish, from salads to sandwiches.
In this article, we’ll provide a step-by-step guide on how to pickle garlic at home.
Pickling garlic is an excellent way to preserve it and enhance its flavor. In this guide, we’ll show you how to pickle garlic in easy steps.
Benefits of Pickled Garlic
Pickling is an excellent way to preserve fresh produce long after they have left their peak freshness, including vegetables like beets, cucumbers, onions, and fruits like peaches and plums.
Pickled garlic is also beneficial because it contains a lot of nutrients similar to raw or cooked versions but has added benefits such as longer shelf life (up to several months), better taste imparted by vinegar or other acids used in preserving foods besides salt (which can be harsh on some palates), as well as increased digestibility due to beneficial bacteria growing during fermentation.
Choosing the Right Garlic
Before you start your pickling process, ensure that you have selected fresh quality heads of garlic that are free from bruising or soft spots.
You also want to select firm cloves that are uniform in size since this will make them easier to put into jars uniformly without any gaps forming between them during the pickling process.
Equipment Needed for Pickling Garlic
- Glass jars with tight-fitting lids
- Vinegar (white, apple cider or red wine vinegar)
- Water
- Salt
- Sugar
- Spices (optional)
- Cutting board
- Sharp knife
- Measuring spoons and cups
- Funnel
- Ladle
Preparing the Garlic
Start by peeling the garlic cloves, using either a small sharp knife or a garlic peeler. Avoid crushing the garlic cloves as this will cause them to lose their shape.
Place your peeled cloves in a bowl of cold water for about an hour to soften them up and remove any residual dirt that may be on their surface. Drain after your hour is up and pat dry with a paper towel.
Preparing the Brine Solution
Making a brine solution requires mixing salt, sugar, water, and vinegar in specific proportions to maintain food safety standards while preserving flavor.
To make this pickling solution:
1. Mix 2 cups of vinegar (white, apple cider or red wine vinegar) with 2 cups of water in a pot.
2. Add 1 tablespoon of salt and 1 teaspoon of sugar to the mixture.
3. You can also add spices like black pepper, bay leaves or dill weed for additional flavor.
4. Heat your mixture over medium heat until everything dissolves into uniform consistency without boiling it.
5. Allow it to cool before pouring it into jars prepared for pickling.
Sterilizing Jars for Pickling
Sterilizing jars before pickling prevents contamination from bacteria that could cause spoilage.
To sterilize jars:
1. Wash your glass jars with warm soapy water and rinse thoroughly.
2. Place them upside down on an oven rack lined with parchment paper.
3. Bake at 120°C/250°F in preheated oven for about 15-20 minutes.
4. Once they’re done, remove them from the oven and let cool.
Ensure that the jars are still warm when you add your garlic cloves to your brine solution. This avoids cracking the jars from adding hot liquids to cool glass.
Packing the Jars with Garlic Cloves
1. Using a sharp knife or garlic press, chop or crush cloves to the desired texture – halves, quarters, or finely minced.
2. Use a funnel to pack cloves into sterilized jars tightly, pressing down gently with a spoon as necessary.
3. Keep in mind that leaving too much headspace could cause spoilage since it allows air pockets to form around garlic.
Pouring in the Brine Solution
Once you’ve packed your jars with the cloves:
1. Pour cooled brine solution into them until all cloves are covered.
2. Leave about half an inch of space below lids (headspace) for pickled garlic to ferment properly without spoiling due to oxygen exposure during storage.
Tap filled jars gently on a flat surface several times after filling them with brine; this will release any trapped air bubbles and settle contents evenly inside jars.
Sealing and Storing the Jars
To store pickled garlic properly:
1. Wipe jar rims clean using a damp cloth before putting lids on tightly.
2. Label each jar with date of preservation so you can easily track how long it’s been stored.
3. Store your sealed pickle jars in a cool dry place like a pantry where temperatures range between 55-75°F (13-24°C).
4. Avoid storing pickle jars near direct sunlight or heat sources like stovetops and ovens as this will spoil them faster than expected otherwise.
Pickled garlic is ready for consumption after fermentation time has elapsed, around two weeks after preservation under optimal conditions – temperatures between 65-70°F (18-21°C).
Tips for Storing and Using Pickled Garlic
Here are some handy tips to help you store and use pickled garlic:
- Store it in the refrigerator after opening to prevent spoilage
- Use it as a condiment or ingredient in dips, salads, sandwiches, pizzas or any dish that requires garlic flavor
- Add it to sauces, soups or stews for additional flavorDo not reuse brine solution from previous pickling batches as it can cause unwanted bacteria growth making your preserved foods unsafe for consumption
Final Thoughts
Pickling garlic is a simple process that yields flavorful results that can be used in many recipes. With this guide on how to pickle garlic at home easily – you can enjoy its many health benefits year-round.
FAQs
1. How long does pickled garlic last?
Pickled garlic can last up to six months if stored properly in cool dry places like the pantry.
2. Can I reuse brine solution from previous batches?
No! It is not safe since reusing brine solution from previous batches can cause bacterial growth leading to spoilage of preserved food items.
3. What type of vinegar should I use when pickling garlic?
Any type of vinegar works great for preserving foods; white wine vinegar adds less pungent taste while apple cider vinegar gives a slightly sweeter touch, red wine vinegar has a more robust flavor.
4. Can I pickle garlic in other liquids besides vinegar?
Yes! Pickled garlic can be preserved in other liquids like lemon juice or soy sauce, but this will alter the final taste.
5. Can pickled garlic be used as a substitute for fresh garlic?
Yes! Pickled garlic offers the same nutritional benefits as fresh cloves, albeit with a slightly different taste profile.
