
Are you ready to add a delicious and crunchy twist to your meals?
Pickling okra is easier than you think and will bring a unique flavor to your table.
Whether you’re looking for a way to preserve the summer harvest or just want some tasty snacks in the fridge, pickled okra is ideal!
In this step-by-step guide, we’ll show how easy it can be for beginners to pickle okra at home. Let’s get started!
What You’ll Need to Pickle Okra
To pickle okra, you will need the following supplies:
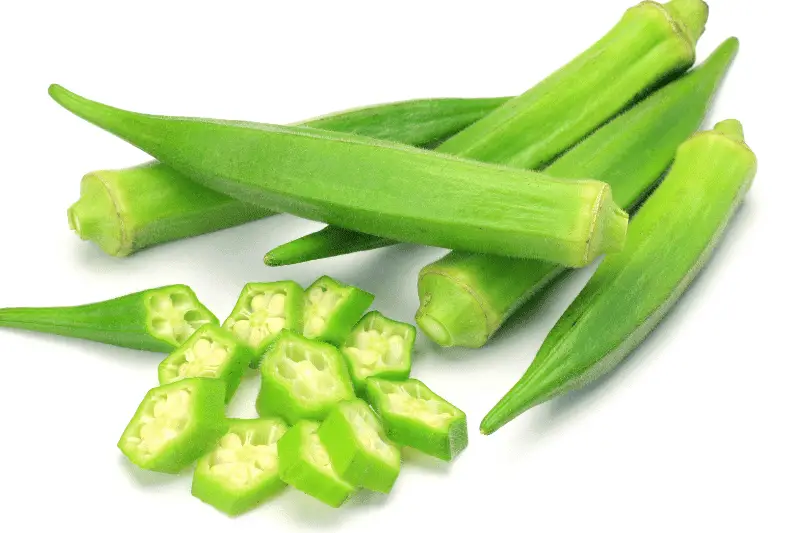
1. Fresh okra
2. White vinegar
3. Sugar
4. Salt
5. Your favorite herbs and spices (optional)
6. Jar or container with lid for storage
7. A stainless-steel pot or non-reactive cooking vessel
Here’s a great recipe for making delicious pickled okra:
1. Start by cleaning and trimming the okra.
2. Add your desired herbs and spices to the bottom of a clean mason jar.
3. Fill the jar with enough vinegar to cover the okra and add sugar and salt to taste.
4. Carefully place the okra in the jar, using an object like a chopstick or spoon handle to push them down if necessary.
5. Close the lid securely and store for at least 3 days in a cool, dry place before eating.
6. Enjoy your pickled okra!
Preparing the Okra for Pickling
Start by washing your okra with cold water and allowing them to dry completely before cutting off the stems and slicing them into small rounds or lengthwise pieces.
Depending on your desired flavor, you’ll also want to prepare your brine solution using vinegar, sugar, salt, garlic cloves, and other seasonings.
Submerge the okra into the brine solution and allow them to soak for several hours, occasionally stirring to ensure they get well-coated with the mixture.
Once the okra has soaked in the brine solution, drain off any excess liquid and spread out onto parchment paper or a drying rack if you’d like to dry them.
Allow the okra to dry for several hours or overnight before transferring them into an airtight container and storing in your pantry until ready to use.
Making the Brine Solution
Making the brine solution for your homemade pickles is one of the most important steps to get right. It’s easy to do, but there are a few things to remember for maximum success.
First, you’ll need enough water and salt to cover all of your vegetables – usually, about 4 cups of water with 3 tablespoons of sea salt works well.
Next, be sure that you use good-quality sea salt with no additives or preservatives.
Finally, give it some time!
Letting the brine soak overnight ensures that all those delicious flavors will come through when you bite into your finished pickled okra.
And don’t forget to taste your brine solution before you pour it over the vegetables – that way, you’ll know exactly how much salt and flavor your okra will have!
Packing Your Jars with Okra and Brine
Nothing compares to the feeling of canning your okra and brine.
From cracking open the jar lid to seeing that delicious deep green color swirl in the salty liquid, it’s an experience you won’t soon forget!
It’s so simple, too – you need a few jars, some fresh okra, and your favorite brine recipe. If you’re looking for extra flavor, try adding garlic or herbs like oregano or basil to kick up the taste.
The best part about making this dish yourself? You get to control exactly what goes in it! So go
Sealing and Processing the Jars for Storage
To put okra in a mason jar for pickling, start by cleaning and trimming the okra.
Then, add your desired herbs and spices to the bottom of the jar.
Fill the jar with enough vinegar to cover the okra, and add sugar and salt to taste.
Carefully place the okra in the jar, using an object like a chopstick or spoon handle to push them down if necessary.
Close the lid securely and store it for at least three days before eating.
Enjoying Your Deliciously Crunchy Pickled Okra!
Once your pickled okra is ready to be enjoyed, simply open the jar and dig in!
Whether you sprinkle some over a salad, eat it as a snack straight from the jar, add it to a sandwich for some extra crunch, or use it in recipes for a different flavor, your fresh and tangy pickled okra will never disappoint.
Enjoy this delicious and unique pickle with your family and friends, or keep it all to yourself – either way, you’re sure to love it.
Just store it in the refrigerator after opening it so that your okra stays fresh for as long as possible.
With its intense flavor, crunchy texture, and endless possibilities for use, pickled okra is sure to become a staple in your kitchen.
Final Thoughts: A Tasty Twist on Healthy Eating
Healthy eating doesn’t have to be bland or tasteless.
With a few simple steps and tasty ingredients, you can make delicious meals that taste great and provide the nutrients your body needs.
From adding fresh herbs to incorporating more veggies into your favorite dishes, there are countless ways to put a fun twist on healthy recipes.
By being creative in the kitchen, you’ll be well on your way toward enjoying healthier meals without sacrificing flavor!
